Your core is made up of muscles in your abdomen, pelvis and back. These core muscles create stability for your entire body, allowing you to twist, bend and maintain an upright posture. Weak core muscles can lead to back pain, fatigue, poor posture and imbalances in the alignment of joints. To help their patients strengthen their core muscles, chiropractors often recommend home stretches. Yoga is a fantastic type of movement to help build a strong and stable core. So roll out your yoga mat and fire up your core with the following poses.
Research has shown a regular yoga practice can help promote better sleep, stress management, and mental health. While all the muscles in your core (glutes, back, abs) activate throughout a yoga flow, below, certified yoga instructor Amanda Quadrini demonstrates some poses that particularly target your abdominal muscles. Do these exercises as a stand-alone core workout or incorporate them into your favorite sequence:
1. Tabletop hold (tabletop press)
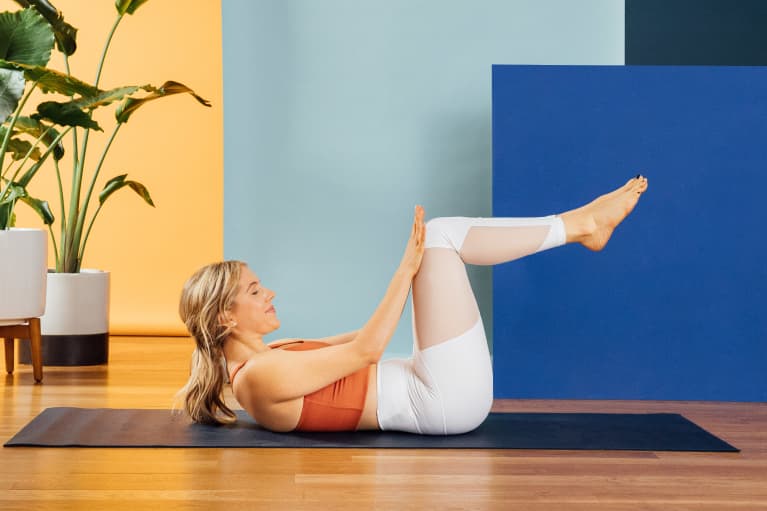
- Start by lying on your back with your knees bent at 90 degrees, stacked directly over your hips, and shins parallel to the floor.
- Place your forearms onto your thighs below your knees. Press your forearms into your thighs, lifting your shoulder blades off the mat.
- Keep your low back glued to the mat by pulling your belly button toward your spine and engaging your core. This is where the work happens—the curve that keeps your lower back off the ground in a neutral position should not be there, which will really light up your abdominals.
- Press your forearms into your thighs and your thighs into your forearms while engaging your core. Remember to keep your knees over your hips (it’s normal to want to bring them closer to your face, but try not to). Continue to hold and press as hard as you can, keeping your shoulder blades off the mat.
- Hold for 10 to 12 breaths, release the press, and continue with two more sets.
2. Tabletop hold with block

- Taking a yoga block between your forearms and thighs, press both forearms into the block while maintaining that contraction in your core. Slowly start to shift more force into your left forearm, in order to hold the block in place between your left forearm and left thigh.
- With both forearms still on the block, point your right toe. Slowly start drawing your right knee away from the block, and keeping the 90-degree bend in your right knee, tap your right toe to the mat. From there, bring your right knee back to the block, hold for the inhale, and then switch sides on your exhale.
- Your upper body and the block should stay still in the isometric hold, shoulder blades lifted off of the mat, as you lift and lower alternating legs.
- You can also try this with straight legs rather than keeping the 90-degree bend. In this case, slowly straighten your right leg as you lower it to hover 2 inches off the mat, hold for a breath, then bring your knee back to the block. Hold, and then switch sides.
- Use your breath to guide your movement, inhaling as you bring your knee back to center and exhaling as you lower your leg toward the mat. You can do three reps on one leg and then switch, or alternate legs until you’ve done three on both sides.
3. Forearm plank
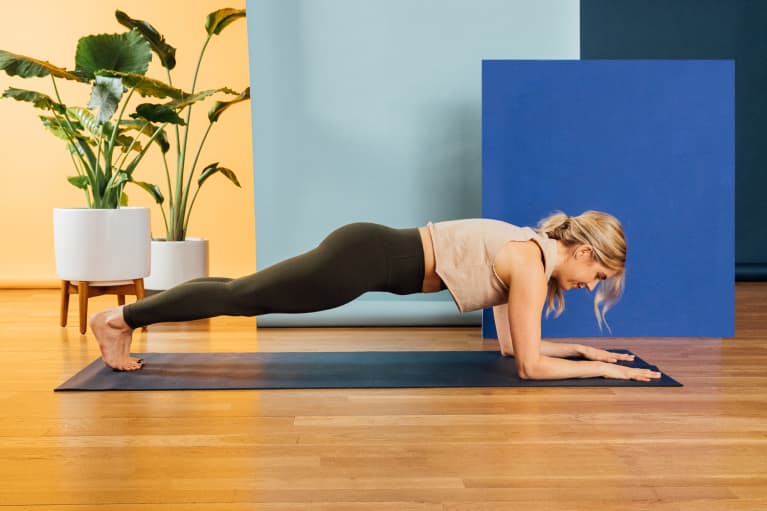
- Begin in plank pose (or a high pushup) with shoulders stacked over wrists and the body in a straight line.
- Lower onto your forearms, one arm at a time, keeping shoulders and elbows in line. Press your hands and forearms down as you draw your belly up and in.
- Push heels back and engage your thighs, squeezing them together. Gaze just in front of your hands, keeping your neck in line with your spine.
- Hold for 30 seconds to a minute. Exit by gently coming onto your knees.
3. Plank knee tap
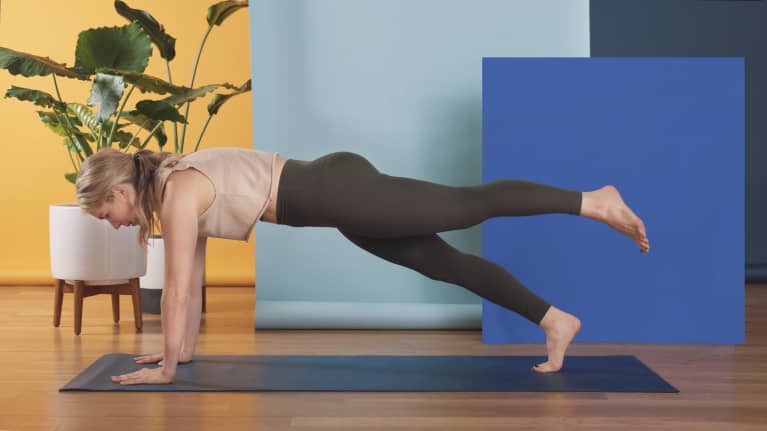
- Start in plank pose, making sure shoulders are stacked over wrists and the neck is neutral. Your body will form a straight line as you lightly squeeze your glutes and hamstrings and engage your core. You should feel one long line of energy from the crown of your head to your heels.
- From here, holding the plank, bring your right knee into your chest. As you squeeze your core and your right oblique, feel this isometric hold and keep your shoulders stacked over your wrists. Then, keeping your knee where it is, slowly tap your right knee to the mat as you inhale.
- As you exhale, lift your knee toward your nose making a catlike spine, doming your shoulders and creating space in the upper thoracic. As you squeeze your core, the backside of your body will have more space to open up.
- Come back to plank on an inhale and switch sides. Continue as you link your breath to the movement.
- Complete 20 to 30 reps (one rep = both sides). You can choose to complete a set of 10 one side at a time, or alternate left to right.
5. Boat pose (navasana)
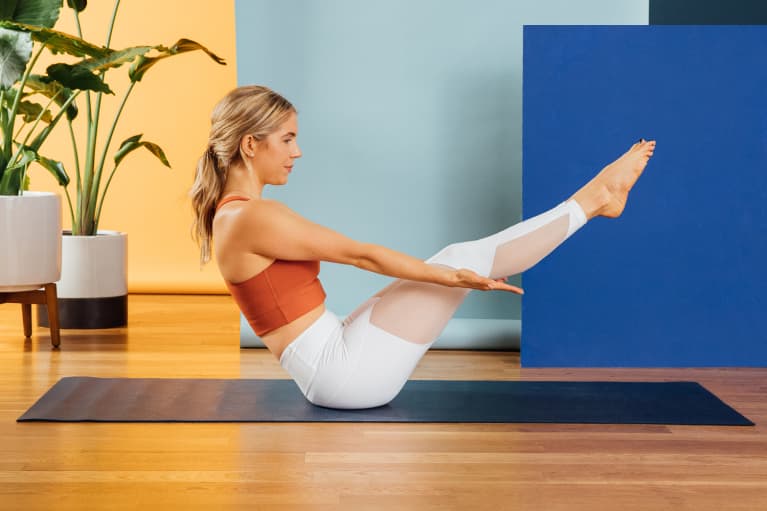
- Begin seated with your legs out in front of you, bent so the soles of your feet touch the ground. Bring your arms behind you, placing your hands in line with your shoulders, fingers pointing toward the front of the mat.
- Engage your core and begin to lean back, lifting your feet off the floor, balancing on your sitz bones.
- With active legs, bring your thighs to a rough 45-degree angle and shins parallel to the floor. Squeeze your legs together and shine your chest upward, keeping your spine straight.
- Bring your arms to the sides of your shins, parallel to the floor. If you’re stable here, begin extending the legs until you’re shaped like a V.
- Breathe and hold for 30 seconds. Release on an exhale.
6. Boat pose side crunch
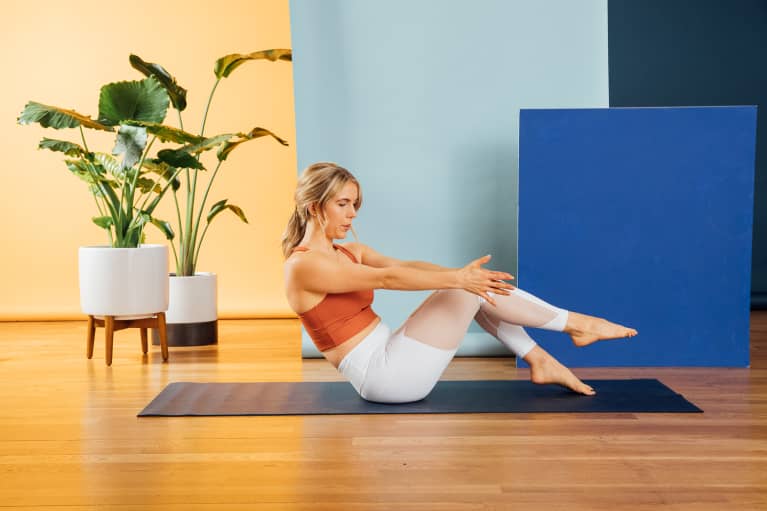
- Begin seated with your legs out in front of you, bent so the soles of your feet touch the ground. Bring your arms behind you, placing your hands in line with your shoulders, fingers pointing toward the front of the mat.
- Engage your core and begin to lean back, lifting your feet off the floor, balancing on your sitz bones.
- With active legs, bring your thighs to a rough 45-degree angle and shins parallel to the floor. Squeeze your legs together and shine your chest upward, keeping your spine straight.
- Bring your hands to prayer above your knees, with active triceps. This is center.
- On an exhale, slowly twist to the right, pointing your hands to the right with active arms. Let your left big toe touch the ground.
- Inhale and come back to center, repeating on the other side. This is one rep. Complete three sets of 10 reps.
7. Twisted crunch
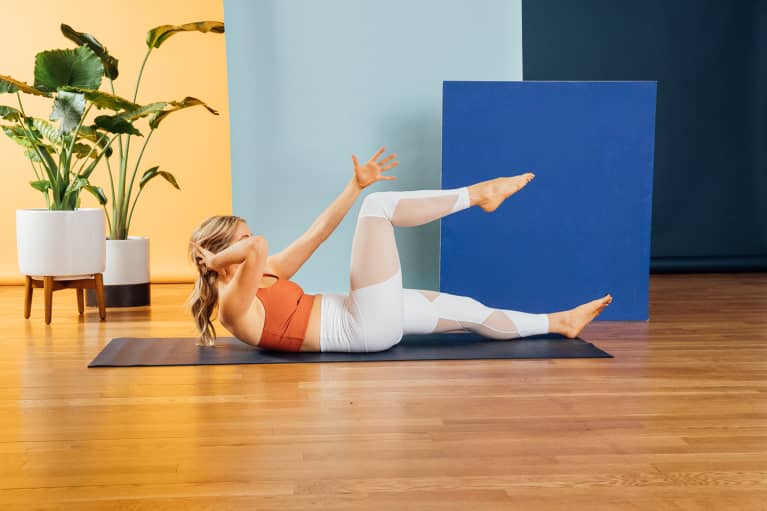
- Begin lying flat on your back, with your hands behind your head and elbows out wide. Lift your feet and stack knees over hips, forming a right angle with your legs. Shins should be parallel to the floor.
- Squeeze your core and tilt your tailbone slightly forward as you press your low back into the ground, leaving as little space as possible between your back and the mat. Try to maintain this connection to the floor throughout.
- With chin tucked, squeeze your abs and bring your shoulders off the mat. As you lift, extend the left leg straight, pointing the toes. Reach your left arm and shoulder toward the right knee, isolating the twist in the core.
- Slowly come back down the way you entered, keeping chin tucked as you untwist and bring your left shoulder and knee back to the center position. Repeat on the right side, reaching toward the left.
- Complete 20 to 30 reps (one rep = both sides). You can choose to complete a set of 10 one side at a time, or alternate left to right.
Add these abs-firing poses to your practice a couple of times a week to build some extra heat and sculpt that core.
Please remember that it is important to consult your doctor before adding new stretches or exercises to your routine. Email us at info@evolvevancouver.ca to learn more or to book an appointment with one of our experienced chiropractors.